
The Ultimate Guide to Getting the Perfect Spray Tan
I’ve created this page because I believe that everyone deserves to feel confident and fabulous in their skin, and a beautiful spray tan can help achieve just that. However, I realized that many people, including myself at one point, aren’t fully educated on how to properly prepare and care for a spray tan. It may seem like a straightforward process, but trust me—there’s more to it than meets the eye!
When done right, a spray tan can give you that sun-kissed glow year-round. But if you don’t take the time to prep your skin correctly, you might end up with uneven color or even patches of faded tan. Not only could improper preparation affect the longevity of your tan; it could also lead to disappointing results. So take a look around and please let me know if you have any questions!
Sunless Tanning 101
-
Safety First:
Sunless tanning products, such as lotions, sprays, and mousses, provide a tanned look without the harmful effects of UV radiation from the sun or tanning beds, reducing the risk of skin cancer and premature aging.
-
Main Ingredient:
The active ingredient in most sunless tanning products is dihydroxyacetone (DHA), a colorless sugar that interacts with the amino acids in the top layer of the skin to produce a browning effect.
-
Skin Types Matter:
The final color of a sunless tan can vary based on skin type, tone, and pH. Those with fair skin might achieve a lighter bronze, while those with medium to dark skin may see a deeper color.
-
Longevity:
Sunless tans typically last between 5-10 days, depending on the product and individual skin turnover. Regular exfoliation (before spray tan) and moisturizing (24/7) can help extend the life of the tan. We’ll be sure to provide additional tips & tricks to help extend your tan’s life.
-
Sun Protection:
Sunless tanning products do not provide UV protection. It’s important to continue using sunscreen when exposed to sunlight, even if you have a sunless tan.
-
Pregnancy:
Before undergoing any beauty treatments, including spray tanning, it's best to discuss it with your healthcare provider. They can provide personalized advice based on your medical history and specific pregnancy concerns.
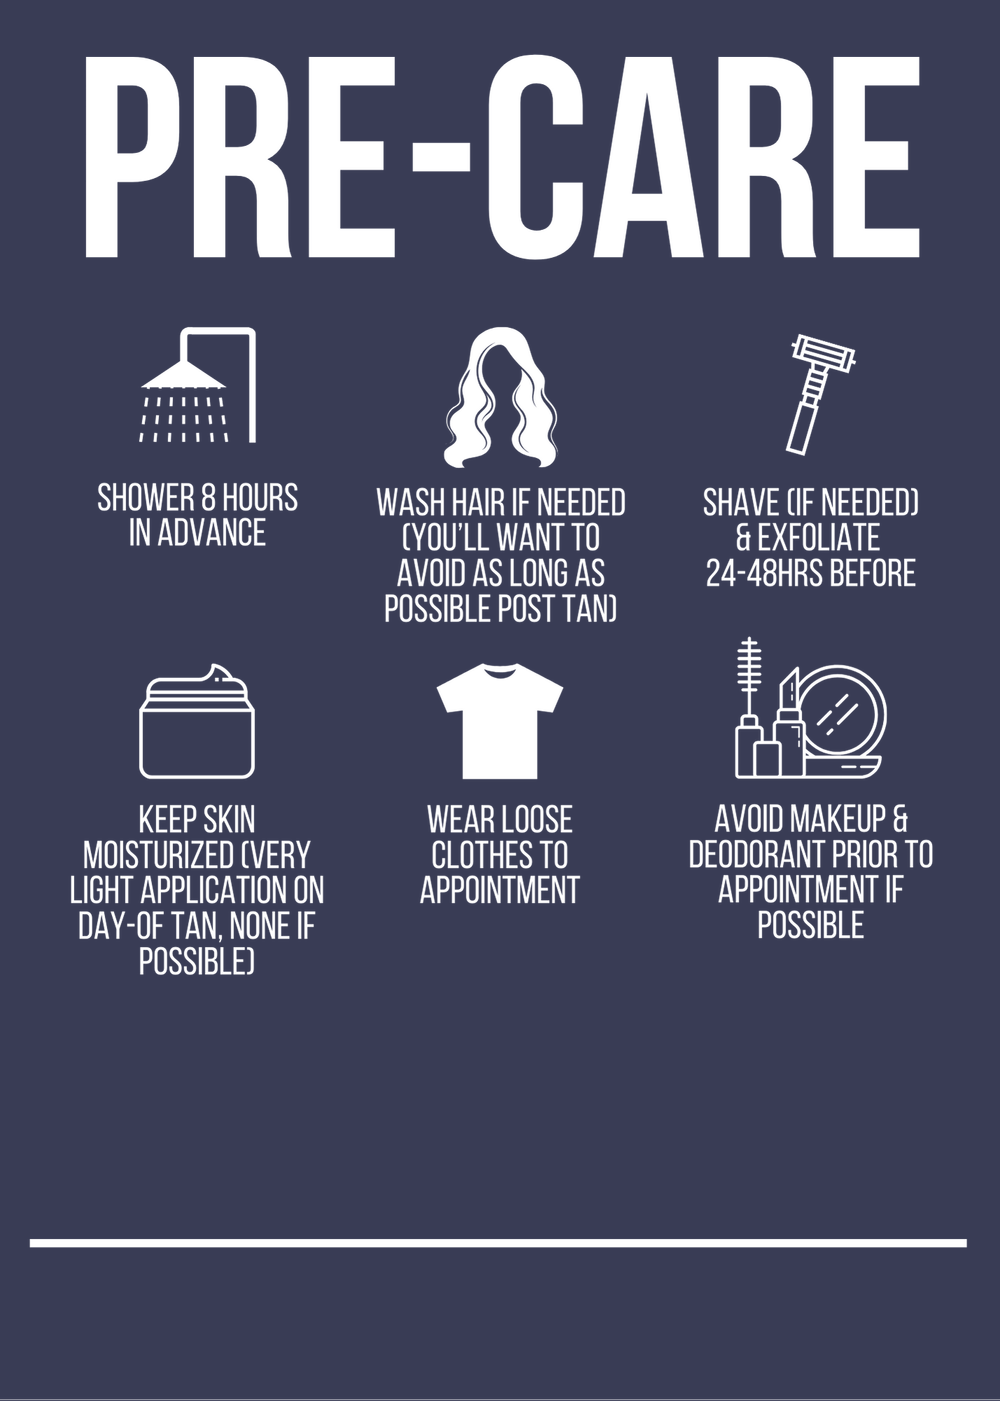
Headed to your spray tan appointment? Dress for success—loose, dark clothing only! Avoid shorts, tight bras, or anything that might rub your fresh tan. Think comfy, not clingy!

What to expect during and after your appointment
Consult:
Your technician will ask about your desired tan level. Be honest about your skin type and any previous tanning experiences to achieve the best results.
Prep:
Dressing for the Tan; You will be provided with a disposable thong and bra, or you can wear your own swimsuit, whatever you’d like to wear is just fine! Some clients choose to go nude, depending on their comfort level.
Protective Gear; Your technician will also provide hair caps, nose plugs, and protective footwear to keep your hair and sensitive areas safe from the tanning solution.
Application:
The technician will use a spray gun to apply the tanning solution evenly over your body. The process usually takes about 30 minutes.
Coverage; Expect to be sprayed in a systematic way, covering all areas of your body. You can ask for touch-ups in areas where you want a deeper color.
Feeling; The solution may feel cool on your skin, and you might notice a slight scent during the application, which fades after the tan develops.
After:
You’ll rinse your tan after the desired amount of time has passed (we’ll discuss rinse timing during appointment as it’s custom). DHA (dihydroxyacetone, the stuff that changes the color of your skin), the active ingredient in our sunless tanning solutions, takes a full 24 hours to fully develop on your skin. That first look in the mirror after your initial rinse isn’t the final result—your tan will deepen over time. Trust the process and the science behind sunless tanning.
For your first rinse, remember:
• Keep it quick—no more than a couple of minutes.
• Use lukewarm water only; hot water can interfere with DHA development.
• Avoid soap—the goal is simply to remove any cosmetic bronzers from your skin.
That’s it! Glow on with your bad self.🤩✨
SPRAY TANS
NEED LOVE
TOO.


Additional RECOMMENDATIONS to help extend your glow-on
BODY WASH
Native
Cetaphil/Cera Ve
Shea Moisture
Hempz
Raw Sugar
(Body wash that’s ‘safe’ to use with a spray tan can increase the longevity of your tan - one’s that aren’t considered safe will strip the spray tan off in a day or two.)

MOISTURIZERS
Glazed Sunless Body Cream (in studio for purchase)
Jergens
Shea Moisture
Cera Ve/Cetaphil
Australian Gold Moisture Lock Tan Extender
(Moisturizing helps your tan last longer by preventing your skin from shedding dead skin cells, which can take the tan with it - recommendation is twice daily after your spray tan.)

OH, DOVE NO!!! Avoid any soaps/moisturizers with mineral oil, alcohol (cetearyl alcohol is fine, common), sulfates, parabens, and strong fragrances. (Dove, Olay, etc.)
What to look for: Sulfate-free, natural oils (shea butter/coconut oil/cocoa butter/etc.), spray tan specific products such as ‘tan extender’ lotion. This also applies to deodorants and antiperspirants for your under arms!
Yes, who doesn’t love a ‘moisturizing’ soap but it can create a coating/build up before your tan, interfering with the DHA bronzing reaction, resulting in lighter tan. These soaps are also known for containing ingredients that are known to strip your tan.

Feeling like you keep pulling a ‘brassy’ color during your spray tan?
Why your pH balance matters:
Spray tans (DHA-based) react with the amino acids in your skin.
The optimal skin pH for DHA to develop into a natural-looking bronze is around 4.5 to 5.5 (slightly acidic).
If skin is too alkaline (common after using regular soaps/body washes), the DHA can oxidize poorly and turn ‘orange’ or uneven.
Ideal Pre-Tan Wash
Use a gentle, sulfate-free, pH-balanced cleanser before the tan.
Ideal Post-Tan Wash
After a spray tan, especially during the first rinse it’s critical to:
Use cool/lukewarm water
Skip soap on the first rinse if possible
Use a gentle, pH-balanced wash from Day 2 onward to maintain color

Recommended Safe Sunscreens for Spray Tans:
Avoid sunscreen sprays with alcohol or heavy aerosol agents right after a spray tan, as they can cause uneven fading or streaking.
Mineral sunscreen sits on the skin and reflects UV rays; gentle but may leave a white cast.
Chemical sunscreen absorbs into the skin and converts UV rays to heat; blends well but may irritate sensitive skin.


BEFORE SPRAY
MANI/PEDI
Maybe you have an event or it’s a holiday… and you need your nails done! It’s super important to have them done at minimum 24 hours before your spray tan.
LASHES
We recommend getting your lashes done 1-2 days before your spray tan appointment. This helps avoid any reactions between lash glue and tanning products.
RECENT SPRAY TAN?
Did you have a spray tan done within the past month? Make sure it’s completely off! We need a blank canvas. The specific ‘spray tan’ exfoliating mitts are genius when removing old tans.
GETTING MARRIED?
Be sure to schedule any other prep appointments at minimum the day before your spray tan - this includes mani/pedi’s, waxes, and lashes. Once you receive your tan, try to fit at least (2) rinses in before your wedding to be sure any bronzer is removed.
EXFOLIATING
You exfoliate before a spray tan to remove dead skin cells, creating a smooth surface for the tanning solution to adhere to evenly, resulting in a more natural-looking and longer-lasting tan with no patchy areas; essentially, exfoliation preps your skin for an even application of the spray tan by providing a clean canvas.
Some safe exfoliants to use before a spray tan include:
Pink Himalayan salt scrubs: Made with natural ingredients like coconut oil, shea butter, and pink grapefruit essential oil
Oatmeal scrubs: Gentle and effective, especially for sensitive skin
Sugar scrubs: Made with sugar, extra virgin olive oil, and vanilla extract
How to:
Exfoliate 24 hours before your tanning appointment
Use a washcloth, nylon exfoliating gloves, or even better, a ‘spray tan’ specific exfoliating mitt to gently scrub your entire body
Pay extra attention to rough areas like your knees and elbows
Avoid loofahs, which can cause streaking
Rinse thoroughly to make sure there is no residue left on your skin - any residue left may cause the bronzer to react, turning green. This is most common in the armpit area from deodorant!
Additional AFTER care tips:
Stay hydrated.
Stay out of the heat and direct sunshine.
Take shorter, cooler showers.
Use shaving cream when shaving.
You know that moisturizing strip that’s typically on women’s razors? Well avoid them if possible! They also can create a coating on your skin creating a barrier preventing DHA from getting on your skin (resulting in light tan).
Pat yourself dry instead of rubbing your skin.
Most of us are washing our face at least twice a day - it’s the first place your spray tan will fade. You may want to look into self-tanning face drops. You’ll just drop 3-6 drops into your normal face moisturizer - it’ll keep your face glowy along with the rest of your body! We offer them in the studio for purchase.
You may put deodorant on again after 24 hours!
Want to dive deeper? Check out my blog here for in-depth spray tan tips, behind-the-scenes glow talk, and everything you didn’t know you needed to feel confident AF.


